Global retail eCommerce sales are expected to grow by 16.5% in 2020, to a whopping $3.914 trillion. KPMG reported in their Global Online Consumer Report that nearly 60% of these shoppers say they shop online because they can do it at any time on any day of the week. These trends have been accelerated also by the global COVID-19 pandemic.
Given these numbers, whether you’re just starting out in business or you’ve been selling offline until now, it is imperative that you create an online presence, as well, and take orders through an online channel – via a website, marketplaces, or social media channels. In this article, we’ll focus mostly on websites as a digital commerce avenue. Building an eCommerce website allows businesses to avoid the limitations of a physical retail location or assisted-sales-only approach. Not to mention, you can promote your online store to a wider audience, even across country borders, depending on what you are selling.
Another great thing about starting an eCommerce store with a website is that it requires far less capital than starting a brick-and-mortar store! Of course, there are low-cost physical locations and high-cost, sophisticated websites. We’re generalizing here for companies just starting out. You will still need to invest in technology and promotion, but starting “lighter” sounds appealing, doesn’t it?
When deciding where and how to sell products online, there are many merchants that face the choice of selling in a marketplace or creating their own website. Both of these options have their pros and cons but it all comes down to how truly serious you are about eCommerce. If you are committed to succeed, you should definitely have your own website.
In time, as you build awareness and credibility, you will want to drive more business directly through the website, instead of paying additional commissions to marketplaces. It’s also good to test both channels and see what suits you best, so that you at least make an informed decision instead of relying on guesswork.
You may ask “What do I need to start an eCommerce website?” Starting a website is fairly simple, but you want to do it smart, so begin with a good strategy to launch your digital store in the right direction.
How to start your own eCommerce site
Realistically, all you need to start your own eCommerce site is a domain name (your store URL), and a platform on which you can host and build a website. We assume you already have a product or service to sell, and that you know your target audience.
Now, if you want to start a successful eCommerce business, you’ll want to have a bit more than a domain name and a website. Whatever you do, it’s important to keep it simple. Your buyers (and people in general) have a very low tolerance for complexity. They want to be able to do things quickly and they don’t want to have to put in effort to figure something out.
With this in mind, here are 12 basic steps to build your eCommerce website.
Step 1
Choose (and buy) a domain name or URL – www.yourname.com.
You’ll want your domain name or URL to be as close as possible to your company or brand name so that it is easily recognizable, and people can find you without much effort. The most popular top-level domain is the .com one. If you’re selling only locally in your country, you can go for the country’s specific extension, such as .de for Germany, .br for Brazil, or .co.uk for the United Kingdom, or indeed, other extensions such as .net or .biz.

You can purchase your domain name from eCommerce platform providers, or directly with a domain registrar such as GoDaddy or HostGator. We recommend the latter to have more flexibility in the future, if you want to switch eCommerce providers, for example. We also recommend purchasing your domain name early on. The cost of the domain will depend on how desirable the name is!
Step 2
Decide how you’re going to actually build your website.
You have options here, too – you can use a website builder or you can build it on your own from scratch, but assuming you’re just starting out online and you want to make this fast, you’ll go for a website builder.

The good news is that it doesn’t take long to build an eCommerce website! If you use a website builder, it could be done in a few hours. There are so many drag-and-drop, no-code website builder options that can help you get you up and running quickly. When investigating website builders, you’ll discover names like Shopify, WooCommerce, Wix, Weebly, or Squarespace.
WordPress is also an option; you’ll just need to add an eCommerce plugin. Do some research and see which website builder will work best for you.
Which takes us to the next step.
Step 3
Choose a plan that works for you.
No matter what website builder you use, it’s super easy to create an account. It just requires your name, email address, and a password. But what you really need to think about is which of their plans to select. Plans are generally based on how much you will be selling and what features you need. Most website builders offer multiple plans so that you can select the plan that would work the best for you. Don’t get too hung up over this step, however, as you should have the opportunity to change your plan at a later date if you need to upgrade.
Website builders normally charge a monthly fee, hosting included. If hosting is not included, you’ll need to buy this separately. Also, most eCommerce website builders have a freemium model so that you can try it out for free before committing to a plan.
Above all, make your decision for the eCommerce website builder you’ll use by looking at a combination of the features they offer and the cost per month. Take special note of how easy it is to make changes to your web pages, how many products you can sell, what app integrations they allow, and if you have access to support (and what kind of support!), or various tools such as creating promotions and so on.
Finally, for this step, think about a theme for your eCommerce website. The themes that website builders provide are great because they don’t require any coding or a special eye for design! They have color schemes and fonts that look great together, already paired for you. The theme you choose should align with your buyer and company persona. You can use a template as-is or use it as a starting point for your own imagination and design.
Step 4
Check out . . . the checkout.
A very important aspect to investigate is the shopping cart – what options does the eCommerce provider offer, what out-of-the-box integrations and tools, such as cart recovery, are available and what is included in the price, and so on.
Also, for the shopping cart itself, do you have several templates available to start from, and can you test them within the platform? Can you customize the cart in terms of flow (with or without review for example), in terms of the fields that are displayed, and can you add your logo and change the colors in the cart?
Ideally, the cart should be customized to look and feel similar to your website – at least in terms of logo and colors. The shopper should not notice that they are being redirected to another website.
If you are selling internationally, check out what languages are available for cart localization. In the beginning, you may not want to invest in localizing your website, and will decide to go forward with a site in English only (although in some market segments, that will not work!). However, the ordering and payment processing part is very sensitive, and buyers respond better to localized processes, with the order management system in their native language, currencies, prices, formats, and so on.
In fact, research has shown that customers are at least 70% more likely to purchase if the shopping cart is displayed in their native language and their preferred payment method is listed as an option. Which leads us to the next step: payment.
Step 5
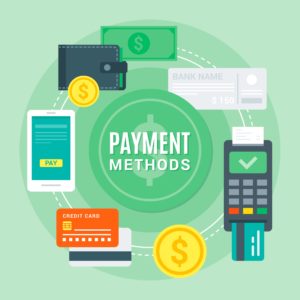
Set up your payment methods.
Closely related to the checkout are the payment methods you’re going to accept via your eCommerce store, defining how your customers will pay you for your products or services.
If you’re selling locally, you’ll know which payment methods are important for your market. When selling internationally, though, things can get complicated. Pay attention to what payment options are available out-of-the-box, which regions they cover – and at what cost. Note that each payment method comes with its own set of fees.
Bonus: Dive deep into all 45+ payment methods and 100 display and billing currencies supported out of the box by 2Checkout.
If you think local payment methods are not needed, think again! Selling into the Netherlands? iDEAL is used in more than 50% of online purchases there. Selling into Brazil? Payment with installments is key for over one third of Brazilian shoppers. Alipay and WeChat Pay have around 80% market share in China, so don’t even think of selling there without these options activated.
Investigate if some payment methods can be displayed versus others in a dynamic way, depending on the country of residence of your buyers, by geo-IP detection. Is this feature available with the website builder you are considering, and for your plan?
Most drag-and-drop website builder tools include payment options, while others allow you to easily set up your own payment processing capabilities, via integration features. Remember that the more localized your offer in terms of payment methods, the higher conversion rates and improved authorization rates.
Plus, there’s more to this than just one-off payments. Are you offering a monthly or yearly subscription service? If so, the payment options you offer need to support recurring billing, and ideally in multiple currencies for those localized prices.
How about compliance – PSD2, SCA, 3DS2? if you’re selling into Europe, you definitely need to look for a provider that will cover all of these situations for you, so you can focus on your customers and the products you deliver rather than payment compliance.
As the payment piece is very important – and complex – give this step more thought. Once it’s been taken care of, let’s move on to building that website!
Step 6
You have your theme set up by now so you can start adding content. This includes the products you are selling, their prices, descriptions, tags by which people can filter, and any images or videos that help your buyers get to know your product better and make the decision that is right for them. Although it sounds easy, even this step requires some consideration. Keep in mind the following:
SEO. People should be able to find you easily. Make sure you are using keywords in your copy and product descriptions that people use when searching for a product like yours.
Bonus: Watch this webinar to learn how to maximize your SEO efforts for eCommerce!
Filters. Customers want to filter and compare your products. See how easy it is to customize the filtering options by category of products to make the process more relevant.
Searchability. A product search is a crucial feature! 35% of eCommerce site visitors say they always use the search feature.
Now, back to adding product information. If you have only a few products or services, this step should not be time-consuming at all. However, if you have a large product catalog, you will want to look into a way to import the information into the platform, to avoid tedious manual work. If you already have a back-end system with product and order information, now is the time to think about your system of record, the authoritative data source for a given piece of information. If that is your back-end application, you need to continuously feed that system with order information from the eCommerce site. Get your IT people involved in this step to make sure the integration is done the correct way.
Step 7
Make sure you are offering a relevant shopping experience, with all that entails: culturally relevant, localized where expected, with all additional capabilities that your audience requires.
Be prepared on the merchandising side of things – promotions, coupons, and so on – for the launch of your store, as well as for subsequent campaigns. This goes back to those capabilities that your eCommerce provider makes available: make sure the promo engine and coupon management get a thumbs up. Similarly, make sure you have cross-selling or up-selling options available in your cart to push that AOV up.
Personalization capabilities, an online review engine, a save-your-cartshoppin feature, wish lists, and many other features can make your site more relevant for your audience. Add them to your own shopping list if they make sense to your business.
Step 8
Set up shipping and or fulfilment. You’ll need to set up shipping if you’re selling physical goods. For this purpose, you need to have in mind where and how you will be shipping your products. Will you offer free shipping? Do you have a flat rate for shipping? Or do you want to define your shipping costs by some other factor? You may want the ability to print labels and manage shipping fulfillment.
Don’t forget to add FAQs on shipping, especially if you are selling internationally. It’s recommended as best practice to clearly display shipping costs within the cart and provide shipping tracking options – which means more integrations, more questions to ask to make sure all you need is available for you.
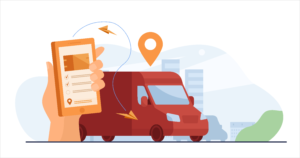
In case you’re selling digital goods, set up your license or access codes delivery systems and consider aspects such as back-up media or download insurance, where relevant. If you are selling digital goods, why not consider some cool stuff, like instant delivery on the thank you page, rather than just in an email confirmation.
If you are selling goods with a subscription attached to them (say monthly or yearly), then you’ve got a plethora of capabilities to consider, from subscription management and billing, to automatic client notifications, and churn prevention tools – both voluntary and involuntary – to boost that renewal rate and, with it, your recurring revenue.
Step 9
A small, but important step: once you’ve got your eCommerce website set up and looking good, it’s time to connect your business domain! You’re so close to being in business.
Step 10
Now you can hit “publish”! But don’t rush things. You’ll want to make sure everything works and is as smooth as it should be before you share and market your website. You don’t want to lower your conversion rates due to a simple oversight or a button malfunction.
This leads to a loathed but necessary step: testing.

Test every single feature on your site, not just for functioning but also for process. Is everything smooth and easy? Test out the checkout process. Do all the buttons work? Are your product descriptions engaging and do they contain all the necessary information? How does your site look on mobile? Is the website design responsive? How does it behave in other browsers? How does the shopping cart look on other devices? Test your ordering system all the way, from the home page to the final notification, post-order.
Another important item to test is load time. Your site and pages need to load quickly. Speed matters — a lot. It matters because it affects your SEO score and it matters because people have such low tolerance for slow processes. 57% of people say they leave a site if it takes longer than three seconds to load. If that sounds harsh, note that even a two-second delay in load time can increase cart abandonment rates by 87%.
Step 11
You have arrived! If everything seems to be in good working order, send people to your online store! Search ads are a quick way to bring leads in, but watch the cost per acquisition, to make sure your budget isn’t drained fast and that your strategy is sustainable for the medium to long term.
There will be a multitude of other avenues you can explore to promote your store, from display ads to email marketing, quizzes or events, and YouTube videos and image-driven social media platforms such as Pinterest and Instagram. All are good ways to promote your site if your target audience embraces these channels.

Influencers who align with you and reach your audience can also get your eCommerce store and its products out to their followers. Influencer marketing is not just for consumer audiences, it works perfectly well for B2B, too. You just need to get the right influencers for your market.
As a long-term strategy, content marketing (SEO strategy included) is great way to attract prospects to your eCommerce store. We’re saying long-term, as it takes time to build up that authority and push your ranking higher in SERP. In the interim, you’ll need to mix content marketing with other communication tools and channels.
Partnerships and affiliate marketing are additional options you can try. Even if you don’t want to start with everything at the outset, having a long-term strategy will help plan and prioritize.
Step 12
You thought it was done, didn’t you? Think again . . . the work doesn’t end here. Regularly look at your analytics to understand where people are dropping off and where things are going really well. It will be useful to analyze marketing campaigns, channels, product lines, partner sales, sales by region, by customer segment, at cohort level, anything that makes sense for your business and helps you optimize and grow.
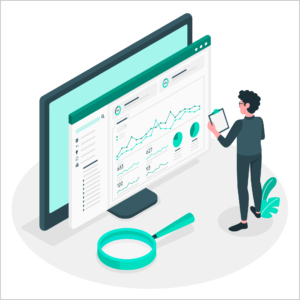
Keep in mind a list of KPIs you want to track as you evolve – and make sure they are presented in the eCommerce dashboard, or that you can at least easily obtain them from existing reports.
Also, keep optimizing key pieces of your online store. Analyze, then test, then analyze again. Test iterations on your cart design or flow, landing pages, email notifications, and your site overall. Having an A/B testing tool embedded in your eCommerce dashboard is immensely helpful here, so you can move faster with testing and be able to act immediately on the insights you get from the tests. This gives you another point to check when you’re deciding which provider you’re going to work with.
Conclusion
Setting up your eCommerce website will definitely give you a competitive advantage over those who have not yet embraced the world of eCommerce. But wait! Given that there are millions of online stores, that’s not very reassuring. You need to find what makes your business unique to your target market, what you do differently, and how you stand out from the online crowd.
Fortunately, your eCommerce website will play a big role in this task. It’s not only how it looks and how you build it, it’s how it works to become an enabler for your business, leading people to it so they can find a solution that only you can provide through the product you offer.
Going further, it’s also about how well your website serves its purpose of helping people purchase online, and what feeling they get after they’ve shopped with you; a positive experience will lead to great reviews and repeat sales.
Now that your are ready to launch your website, discover how 2Checkout’s commerce capabilities can power up your eCommerce business!